STUDY OVERVIEW
A space manufacturer, provided dolphitech with five CFRP samples to test the ability to detect embedded defects over the wide range of thicknesses and laminate types used in their products. Samples 1 and 2 were rectangular ply drop laminates with stepped thickness changes from 1-6mm. Samples 3 and 4 were square panels with a total thickness of 5mm and an adhesive bond at their centreline. Sample 5 was a rectangular panel with 17mm and 27mm thicknesses, and an aluminium backing panel with a square cut out. Technical staff at dolphitech inspected the samples, issued a written report, then presented results live to the manufacturer in the form of an online demonstration.
SOLUTION
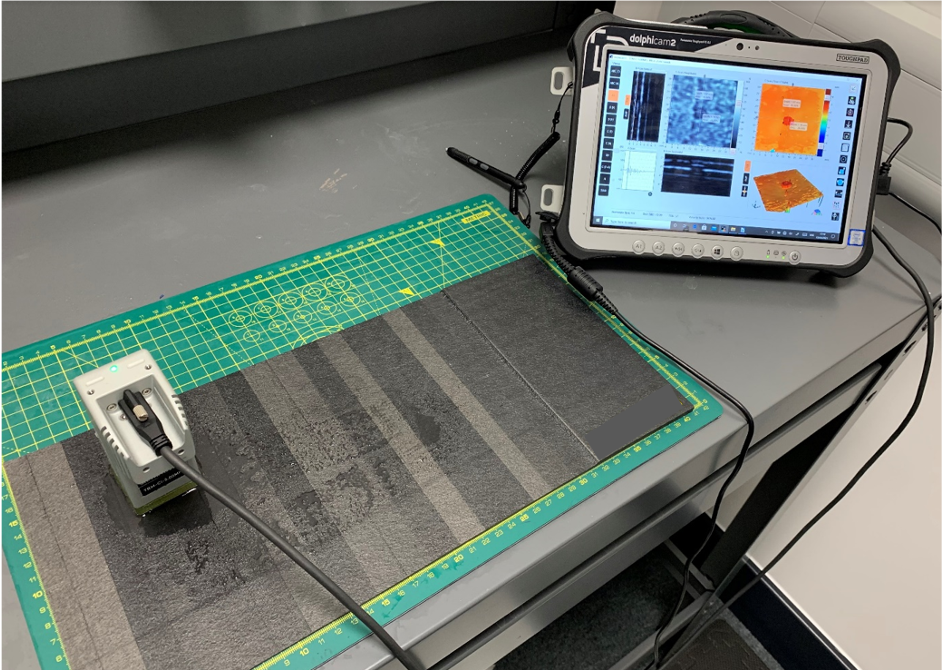
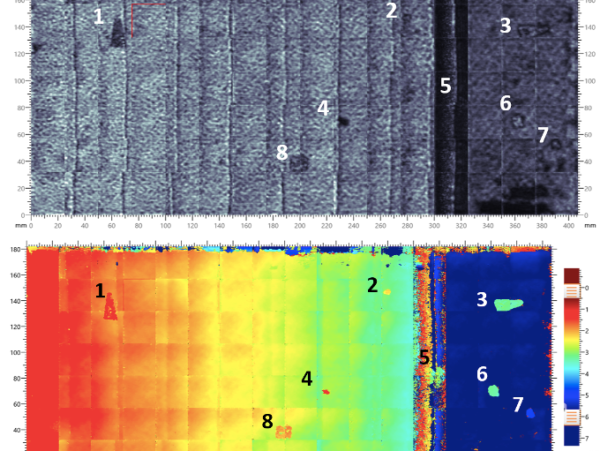
Samples 1-4 were inspected using a TRM-CI-5MHz transducer module (TRM). Sample 5 was inspected using a TRM-BF- 2.5MHz due to its greater thickness. Both TRMs have an 8mm Aqualene delay line, the flexibility of which provides conformance to surface unevenness. Water was used as a couplant, delivered via a spray bottle. All samples were inspected using a manual stitching technique, whereby the probe is moved sequentially over the surface of the specimen, with data acquired at each location. Data was automatically measured and displayed as both amplitude C-scan maps and Time of Flight (ToF) C-scan maps. In the images shown here, amplitude C-scans are displayed in greyscale, with black to white corresponding to increasing signal amplitude. ToF C-scans are displayed with a rainbow colour palette, with red to blue corresponding to increasing material thickness.
CHALLENGES
The manufacturer specified that the non-mould side was the accessible surface, so all inspections were conducted from this face. These surfaces were rougher than the mould side and also contained the ply drops, so the flexible Aqualene delay line was important to enable consistent coupling to the surface.
FINDINGS
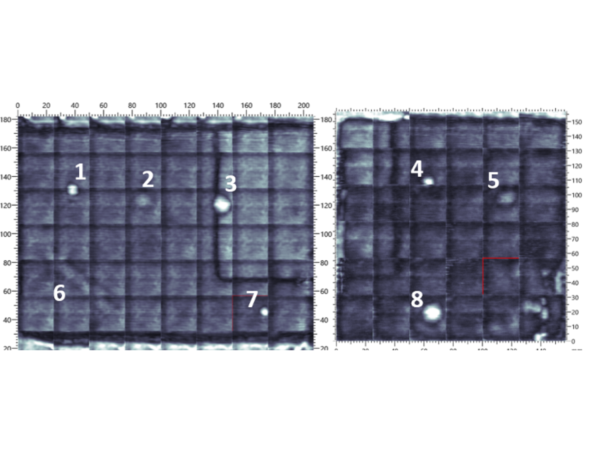
All samples were successfully inspected with the dolphicam2, with indications numbered for each sample. For Samples 1 and 2, the single acquisition setups and gates were able to successfully detect and size the embedded defects across the 1-6mm thickness range. These were readily resolved in the ToF C-scan maps as changes in colour relative to the local laminate thickness. This included defects (Indication #5 in the image below) that were present on ramped thickness change from 4 to 6mm, where optimum probe coupling was not possible.
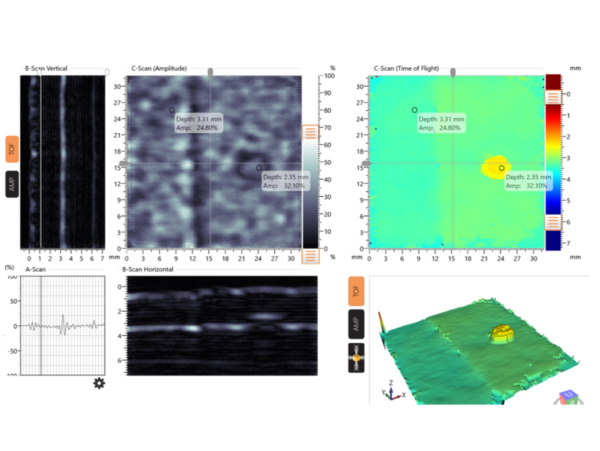
For samples 3-4 the defects in the central adhesive layer were detected and sized.
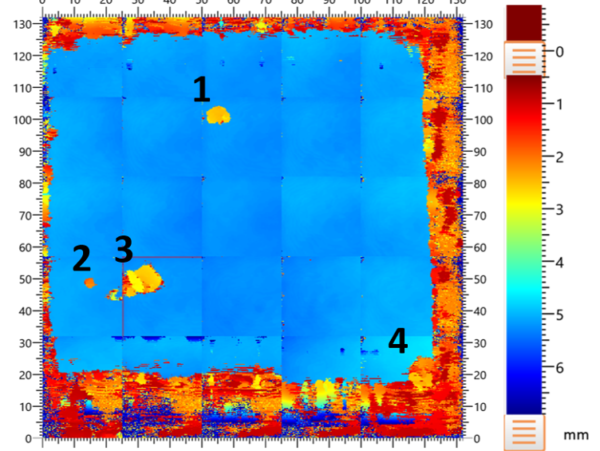
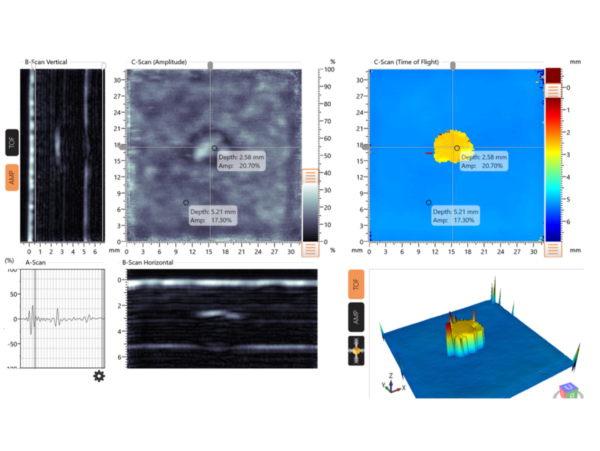
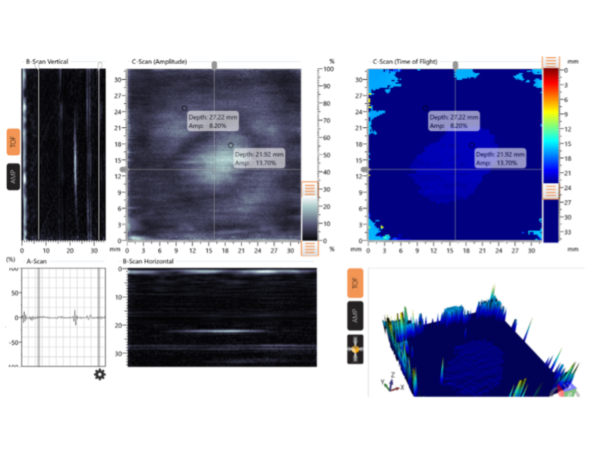
For Sample 5, defects embedded within the laminate were detected and sized successfully. Defects at the interface between the CFRP and the aluminium backing panel were also detected (Indication #6 in the image below). The square cut out from the backing panel was clearly resolved. This area presented as an increase in signal amplitude, as the CFRP/air interface reflects a greater proportion of the sound back to the probe compared to the CFRP/aluminium interface.
CONCLUSION
Three conclusions can be drawn from this study. First, through using two TRMs of 2.5MHz and 5MHz, a large thickness range from 1mm to 27mm was successfully inspected, demonstrating the versatility of these TRMs. Second, the software readily showed defects of different sizes and depths relative to local laminate thicknesses. This enabled single setups to be used to cover large ranges, making inspections more efficient to perform. Third, the Aqualene delay lines were able to conform to both the roughness and non-flatness of the panels, meaning that inspections could be conducted from the non-mould face. With these benefits and with the data at hand, the manufacturer was able to purchase the dolphicam2 with confidence in its performance for their applications.
SPACE TECH MARKET
Our equipment has, and is, supporting some of the most exciting space projects seen this century, and dolphicam2 is helping assure the integrity, viability and investment of some of the world’s most complex, and expensive commercial projects.
Read moreAEROSPACE MARKET
Safety is paramount in aviation. Fast extensive inspection is possible using the dolphicam2 ultrasonic technology.
Read moreREQUEST A QUOTE OR SUBMIT AN ENQUIRY
Need help with product information?
Get in touch with our experts for information or a quotation.
